5.1 Creating Test Case
Each test contains three sections, Setup, Test, and Cleanup. These sections are executed in order from top to bottom. The purpose of these sections is to logically break up the test to make them more readable and maintainable.
It may be helpful to make each test stand-alone so it doesn’t rely on any other test to pass. This means the test will setup the environment the way it expects, then perform the tests, then cleanup the environment so it is clean for the next test. These sections are described in detail:
5.1.4 Create New Test Case
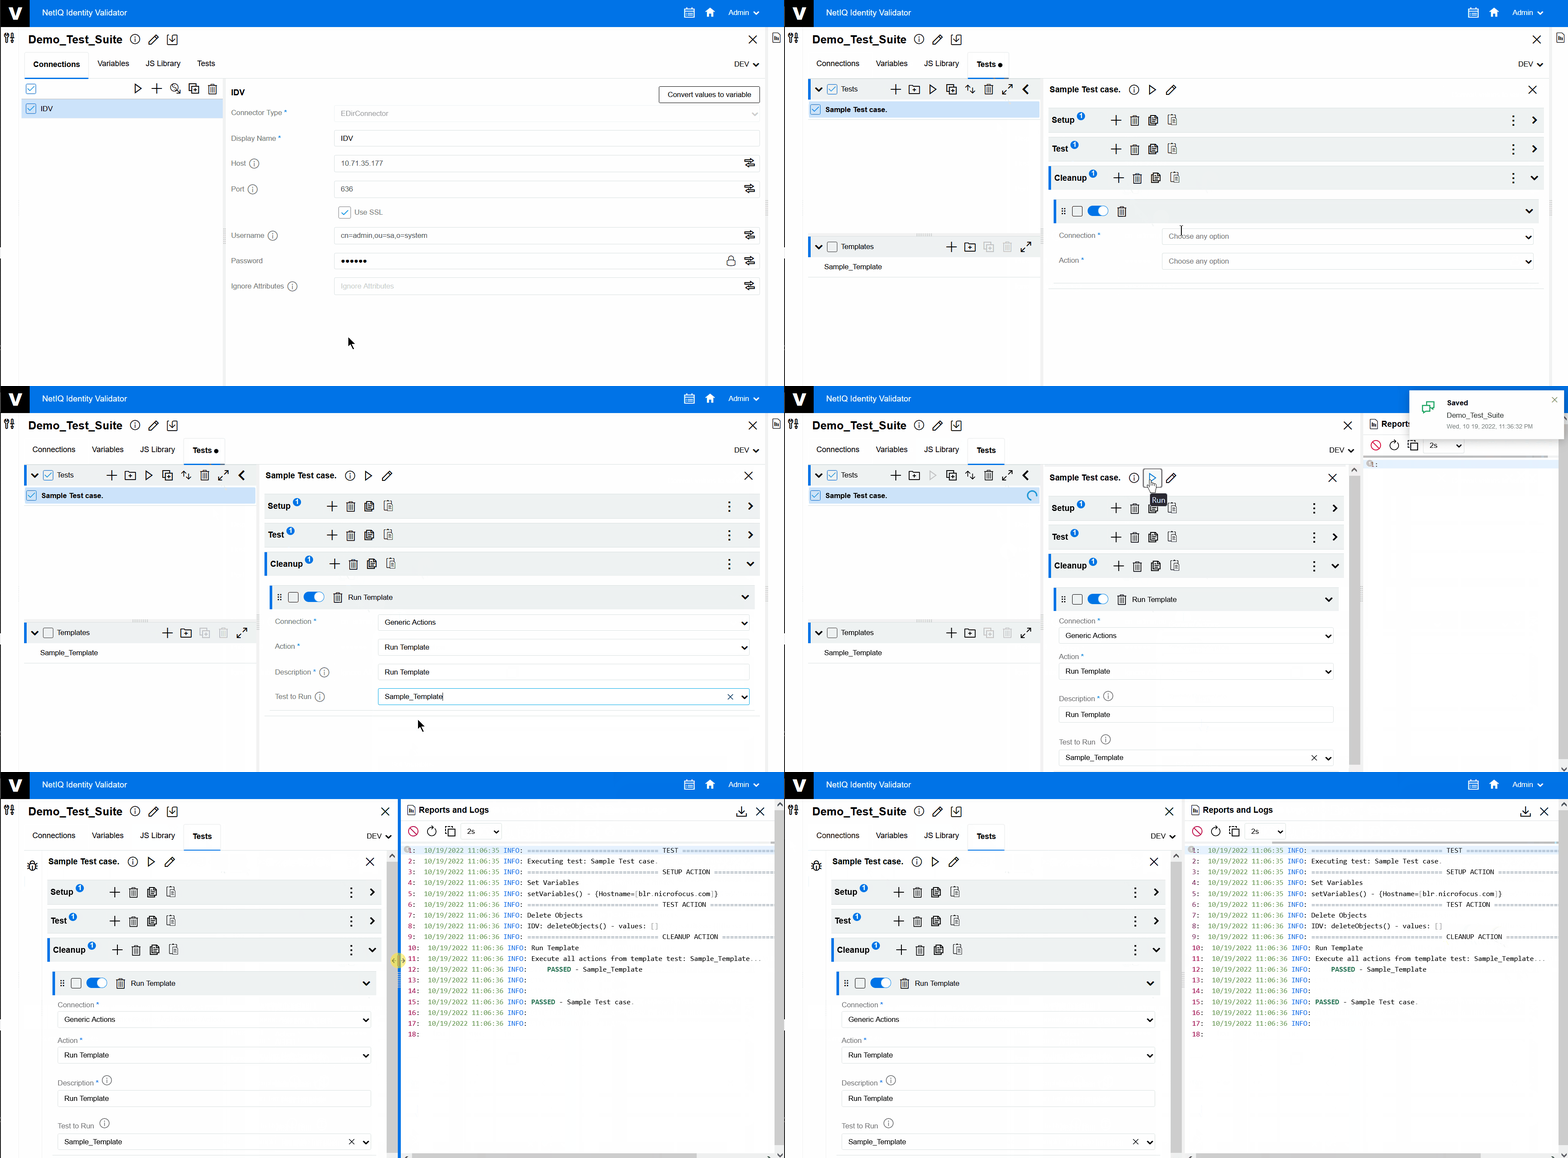
On this page the user can perform activities such as managing Test Case, creating new Test Case, and duplicating Test Case. It is also possible to import existing Test Case to the Test Suite. Other activities such as exporting, deleting, and grouping of Test Cases can also be performed.
To create a new Test Case, perform the following steps:
-
On the tab, click
 to create a new Test Case.
NOTE:There are two options that appear, such as the Test and the Category. The Test option is for adding a Test Case. If you click Category, a folder will be created where you can add all the Test Cases. Categorizing the Test Cases will help in differentiating the Test Cases and identifying them easily.
A new Test Case is created.
-
Select .
-
Click
 to change the Test Suite and .
 -
Click and then click global Save
 .
.Figure 5-1 Create New Test Case
5.1.5 Setup Process
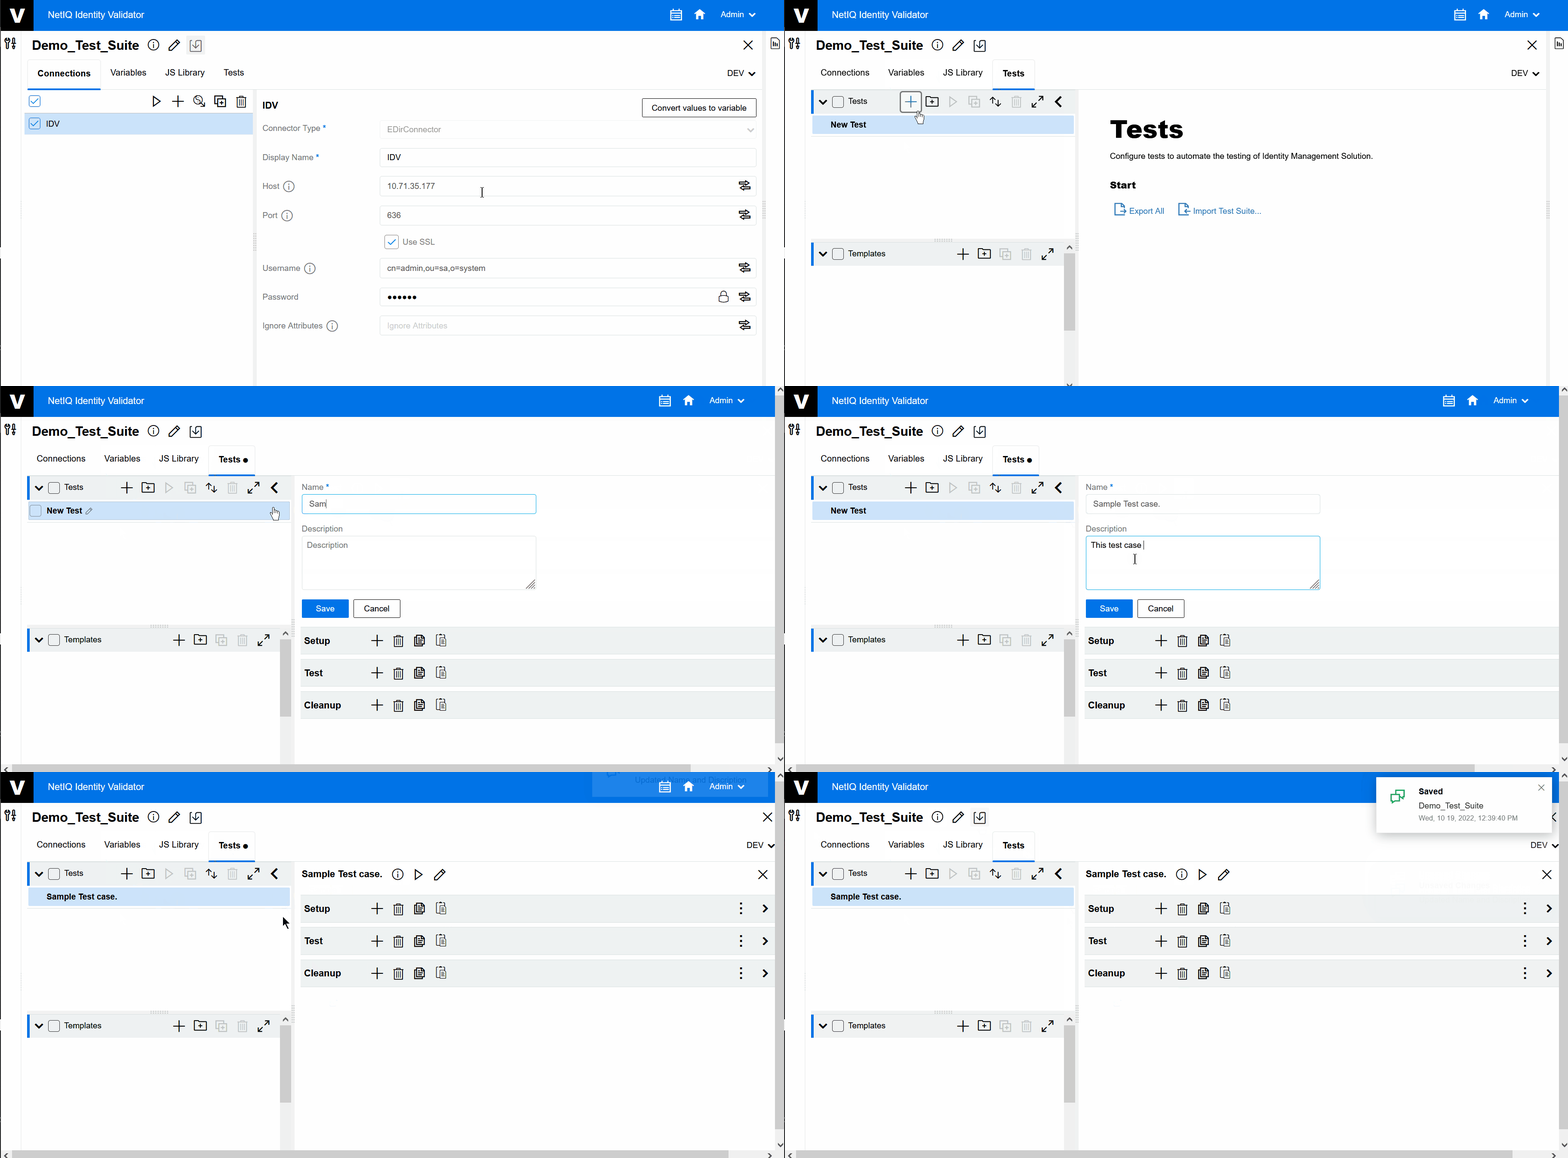
To establish a Setup, perform the following steps:
-
On the tab, click and then
. -
Click
 for drop-down.
 -
Select and , and then fill all the details as per your requirements such as connection, action, description and so on.
-
Click
, and then Run  .
.will appear.
-
Click
to minimize the tab.NOTE:The user can perform any number of Test Cases in all the sections such as Setup, Test and Cleanup.
Figure 5-2 Setup Tab
5.1.6 Test
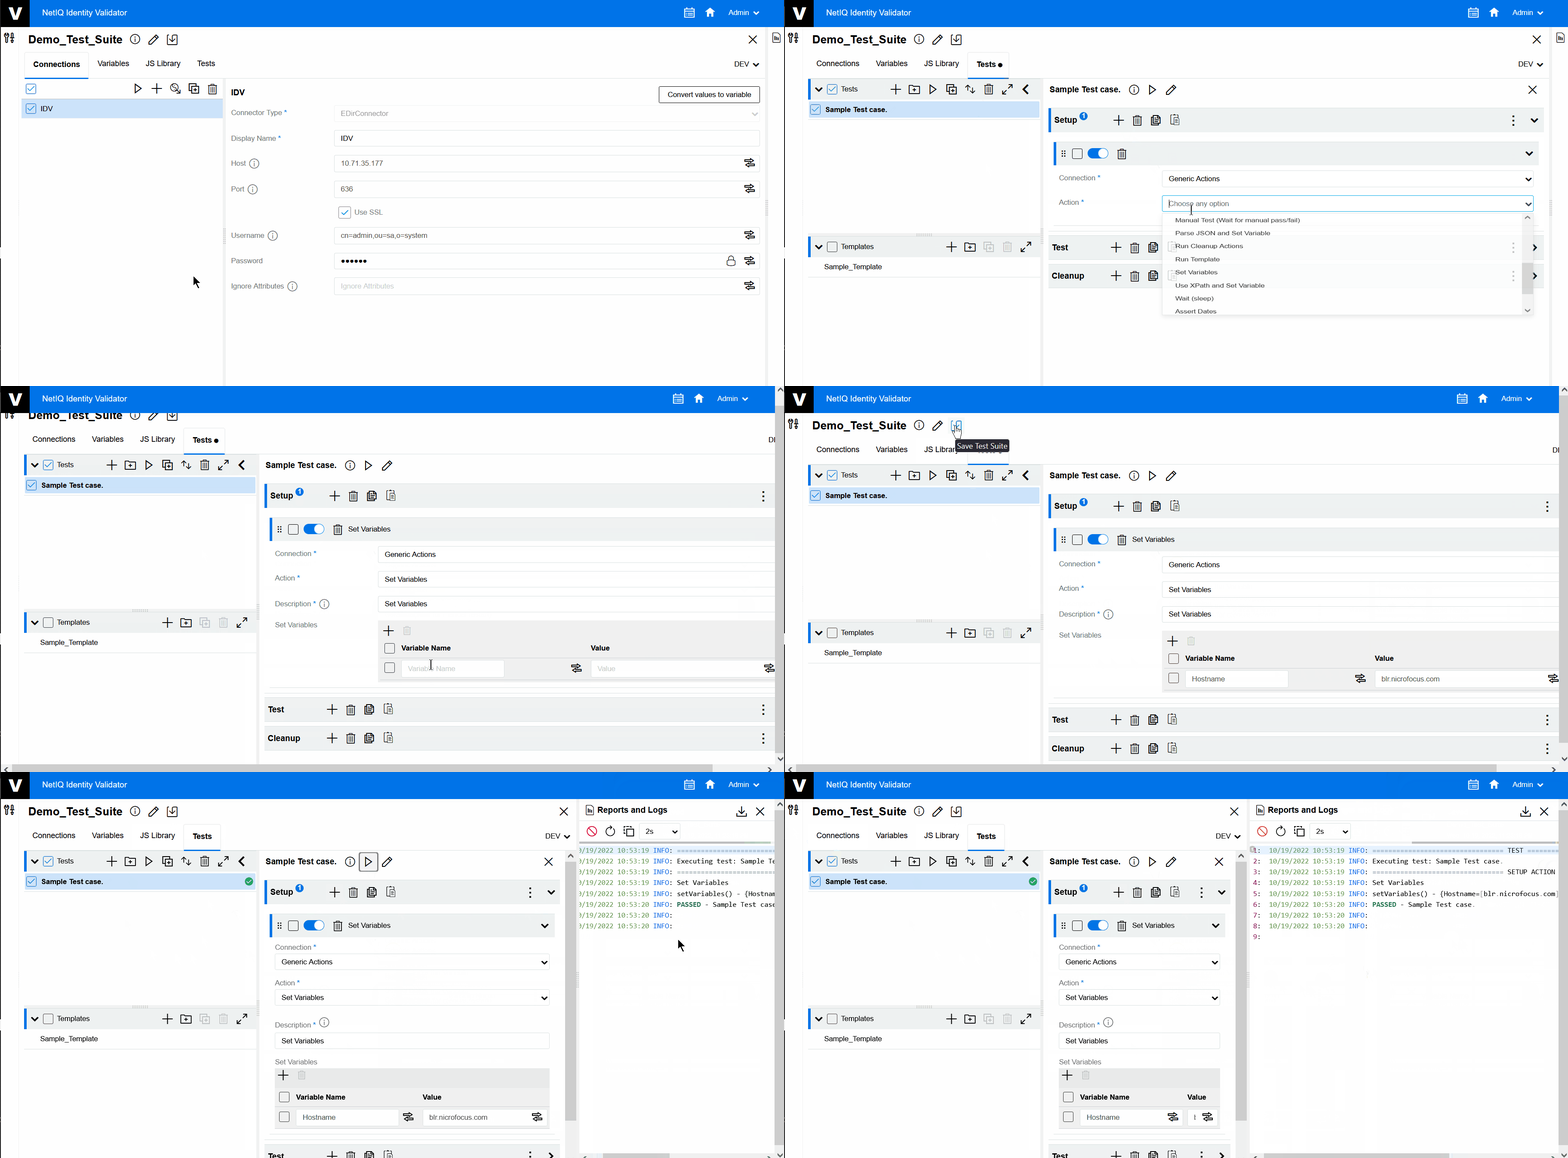
On the sub-tab you can perform the following actions:
-
On the sub-tab > >
to add a new Test. -
Fill all the details as per your requirements such as connection, action, description, Object FDN and so on.
-
Click
, and then Run . -
Click
to minimize the tab.will appear.
Figure 5-3 Test Sub-tab
5.1.7 Cleanup
-
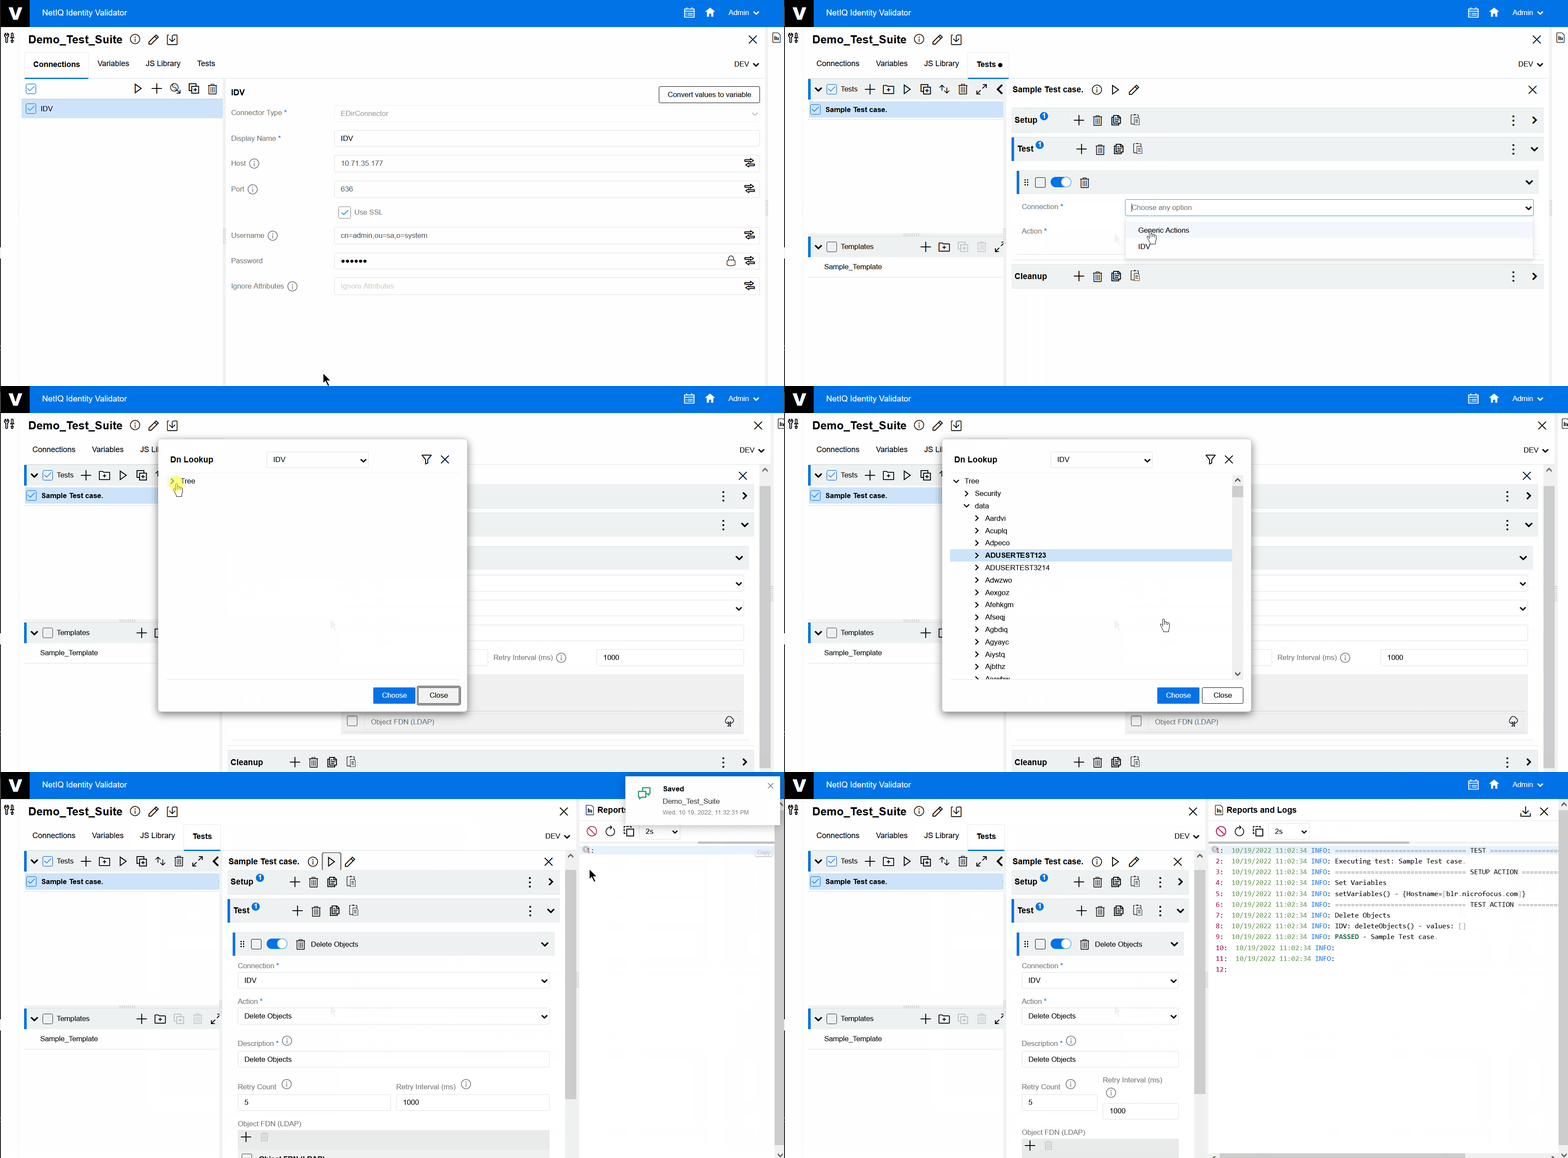
On the tab > > click
. -
Fill all the other details such as Connection, Action, Description, Test to Run, and so on.
-
Click
, and then click .
The screen will appear. This screen has all the details such as, the Object that is created in the , if the is performed Adding Attributes and Values, if the is deleting the Attributes. You can also download the reports by clicking the button.
Figure 5-4 Cleanup