7.2 How Does Git Work?
After logging in to Package Deployment Tool, you can first clone a Git repository. The repository is cloned locally at ./PDT/StagingEnvironment location. The Package Deployment Tool pulls files from the source Git repository.
-
Working Tree: This consists of the files that you are currently working on. You can add, modify, or delete a file from the local code base location. You can modify multiple files at a time. The changes are added to the once you have modified the required information.
The file changes are displayed in the > drop-down option.
-
Staging Area: This is an intermediate storage area. This area has the changes that were made to the files in the . After you add all changed files to commit, they are displayed in the > drop-down option. Git collects all changes which will be part of the next commit action from this area.
-
Git Repository: This is the area that stores all the committed changes. The final version of the changes are available in the Git repository.
After you commit all staged changes to the remote git repository, you can see the committed files in the drop-down option.
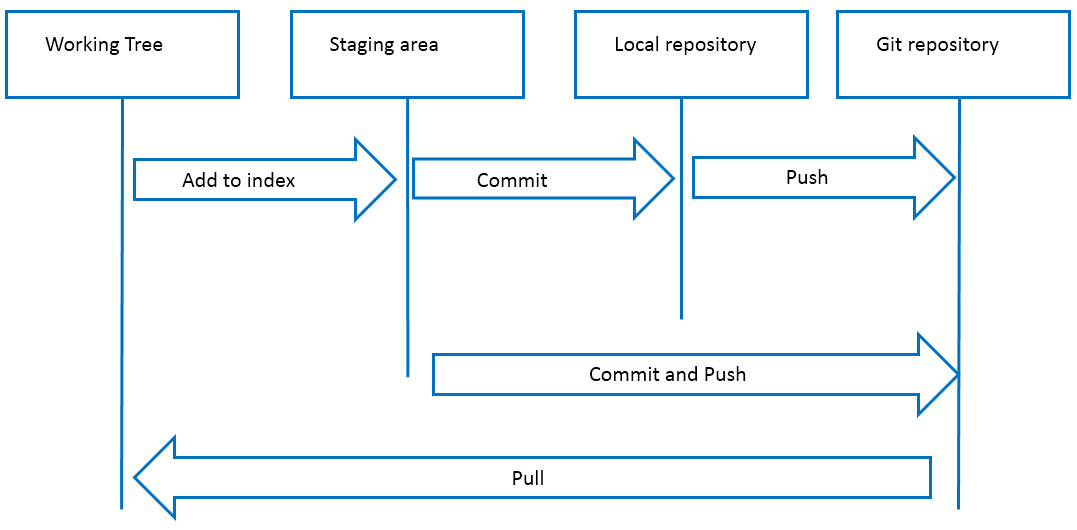
Let us understand how Git works. You first edit the files in the working tree. After editing the file, you move the file from the working tree to the staging area. The option is used to commit the changes from the staging areas to the local repositories. You use the option again to commit changes from the local repository to the Git repository.
You can directly commit the changes from the staging area to the local and Git repository by using the option.
Figure 7-1 Commit, Push, and Pull operation